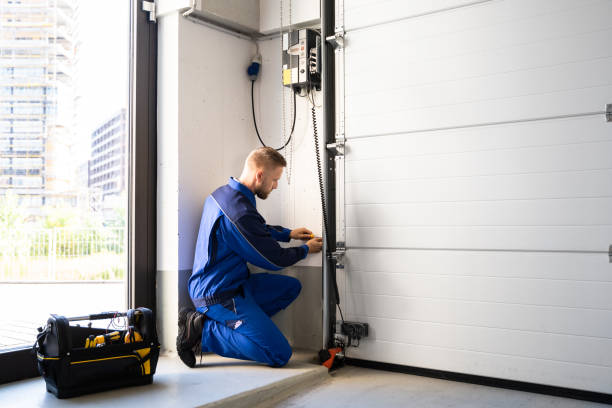
Do you have a broken garage door spring? So today we will show you how to replace garage door torsion springs. First today you have to establish a safe work environment. Replacing garage door springs is dangerous. Always wear safety glasses. Unplug the cord of the garage door opener and disengage the opener from the door. On lift master openers you have to pull the rope down and away from the door.
Gather the proper tools
- A pair of half-inch winding bars taped one inch from the ends
- A sturdy stepladder
- One or two vice grips
- Open-end and socket wrenches
- A file
- An oil can, or three-in-one oil
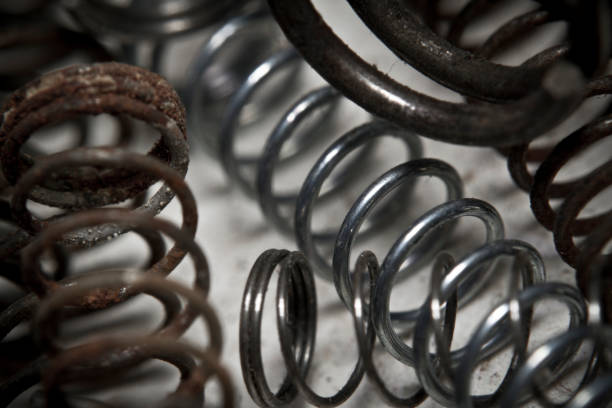
Now, Measure Your Old Springs and your new springs, measure the length of the spring with inch tape, and check the inside diameter. This is to verify you ordered the correct springs. On this door will be installing higher cycle springs. The new springs should last longer than the customer’s original springs. The new springs should last longer than the customer’s original springs. Loosen the set screws on winding cones so the ends recede from the one-inch hole. Place the spring with the red winding cone at the left end of the door, and spring with the black winding cone at the right side of the door. To ensure that the door levels properly when finished. Mark the drums and the torsion shaft at each end with a file or marking pen. Do not grab the shaft or drum.
Now it’s time to unwind your unbroken spring. Collect your tools and center your ladder beneath the wound spring, and just to the inside of the winding cone. For safety keep your head and body out of the path of the winding cone at all times. It’s time to unwind the unbroken springs insert a bar into the winding cone with your right hand, and listen for a click. Never touch a set screw without first inserting a buy valium online america properly fitting bar into the winding cone. And never, never attempt to wind or unwind a torsion spring with a screwdriver. Before loosening the set screws, test the torque of the spring. To do this grip the lower end of the winding bar with your right hand and raise it until the cables are loosened. This will let you identify the torque you will be holding. Continue gripping the winding bars as you loosen both set screws with a 3/8 inch open-end wrench in your left hand.
Properly tightened screws will loosen with less than a turn, but additionally, turns may be required. As the screws loosen, torques is transferred to the winding bar. Grip the end of the bar as you lower it with your right hand to the top strut of the door and rest it there. Grip the lower end of the second winding bear with your right hand and insert the bother bar into the next hole. Raise this bar just enough to pull the lower bar out of the winding cone with your left hand. Lower the second bar with your right hand to the top of the garage door as you did the first bar. Follow this procedure precisely. It’s the only procedure that will allow you to keep your head and torso away from the path of the winding cone in the event it should explode. Repeat these steps until the spring is completely unwound. Remove the bars from the strut and lay them on the floor
Then Next Steps is to Loosen Torsion Hardware. Center your ladder under the broken springs repair. Loosen and remove the two bolts that secure the center stationary torsion cones to the spring bracket. Separate the stationary cones from the center support bracket.
If the spring bracket is slotted, vice grip the bracket to secure the shaft to the bracket. This will prevent the shaft from rolling out and damaging the garage door or shaft. It will also help prevent injury. Test the shaft to assure it can’t slide out the cable drums. Loosen the set screws on the winding cone of the broken spring. A two spring system requires only one bushing. Reposition your ladder and remove the cable from the left cable drum. To prevent the cables from getting tangled, insert the end of the cable into the hole of the hinge, now loosen the set screws on the cable drum until the drum turns freely. Slide the drum away from the bearing plate and examine the shaft and the bearing. If the bearing has worn ridges into the shaft or it the set screws has left raised metal, file the shaft. Slide the shaft to the left about an inch. Reposition your ladder at the right end of the garage door. Remove the cables from the drum, and insert the end into the hinge below. Loosen both screws on the right cable drum and slide the drum to the left. Check the bearing and file the shaft as needed to allow the shaft, drum, and spring to slide.
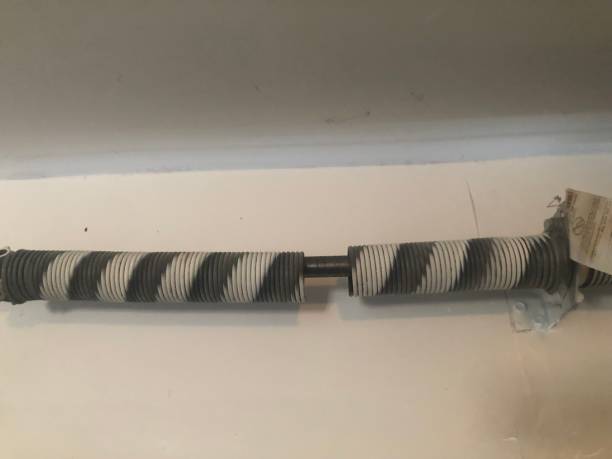
Now it’s time to replace both springs. Pull the shaft to the left, restrain the end bearing plate if needed to allow the shaft to slide completely out of the end bearing. Remove the right cable drum and position it between the track and the flag bracket. Remove the broken spring and replace It with the new one. Notice the black paint on the winding cone. This is a left-wind spring, and it’s installed on the right side of the garage door looking at it from the inside of the garage. Slide spring to the left toward the center support bracket and slide the right cable drum onto the shaft. Reposition your ladder and do the same thing with the other spring. Noticed that this winding cone is marked with red paint. It’s a right-wind spring and it goes on the left side of the garage door when looking at the garage door from the inside of the garage.
At this point, it’s time to secure the torsion hardware. Alight the mark in the cable drum with the mark on the shaft made earlier and tightened the drum screws. Test the screws by moving the drum if the set screws are properly seated, you will not be able to turn the drum. Tighten the screws. Before attaching the cable, bend the ends, so it seats correctly in the drum. Install the end of the cable in the drum. Insert the cable end so the tip is flush with the edge of the drum and it cannot scrape the end bearing plate. While gripping the cable drum with downward rotation to keep the cable tight on the drum. Position your ladder at the other side of the garage door. Bend the end of the cable as before and inserted the end of the cable into the drum so the tips are flush with the rim of the drum. Slide the drum to the right and rotate it until the cable is tight. Check to make sure that tip fits properly into the slot in the cable drum. Slide the drum into the bearing and pull the shaft to the left if needed. The marks should line up. At this juncture both cable drums are secure but the components in the middle are loose. It time to secure the torsion springs in the middle. Center your ladder below the spring anchor bracket if your bracket is slotted remove the vice grip and lube the shaft next to the bracket.
Like Replace Garage Door Torsion Springs, You may also like to read about DIY Tips To Replace Broken Garage Door Springs
Now Raise the shaft slightly and position the race of the bushing on the center support as shown in the pic above. Now attach both springs with each other and match their holes. Align the holes with the slots of the bracket insert the bolts and screw on it and tighten them. Check out center-line measurement of the shaft near the drum and adjust the shaft in the middle to the same distance and Tighten bolts.
Now it’s time to Tension the new springs. Let’s start with the left spring. Position your ladder under and just to the right of the winding cone. Mark the Shaft about an inch beyond the winding cone. Spray the line of paint across the length of the spring insert a rod into the winding cone with your left hand and listen for the click. And watch the tape to determine if the bare is completely inserted into the holes. With your left hand push up on the bar just over 90 degrees, and insert the second bar with your right hand. Lower the second bar to the top reinforcing strut of the garage door with your right hand, and remove the upper bar with your left hand. Switch hands and lift the lower bar with your left hand and insert the other bar with your right hand as before.
Follow this procedure exactly. It’s the only way to keep your head out of the path of the winding cone should it explode. Repeat this procedure with the wind spring. Notice that the spring grows in length as you turn the winding cone as you will notice the cone covering the mark made earlier. As you wind, count each quarter turn until you reach thirty quarter turns, you can also count the spaces between the paint marks.
Before tightening the set screws, you’ll need to stretch the spring about the thickness of one coil. Mark the shaft about 1/8 of an inch beyond the winding cone. Next with your left hand pull the bottom of the bar up and away from the top of the door, and at the same time pull the bar toward you. While pulling on the bottom of your bar with your left hand, tap the top of the bar with the second bar until the cone moves to the mark. The spring may dip slightly in the center. Finger Tighten each screw until it meets the shaft. With a 3/8 open-end wrench in your right hand tighten each set screw and additional ¾ of a turn. Remove the bar it may be necessary for you to push up on the cone with the other bar. Test the set-screw adjustment by pulling down on the bar. The door should rise a few inch as you do this if not, tighten the set screws another ¼ to ½ turn.
Reposition your ladder at the left end of the door. Reach up and remove vice grip from the shaft. Adjust the vice grip and secure the track about three inches above the middle roller to help protect you later if the springs are too strong.
Now it’s time to tension the spring on the right. Reposition your ladder, and mark the shaft just beyond the cone and paint the spring as before follow the same procedure as before. If the door rises by itself, the springs are either over-wound or the springs are too strong. This could be a very dangerous situation you need to do additional testing to ascertain the cause of the problem. Raise the door slowly to check the balance. If you have the right springs, the door should say down when closed, open at the halfway point, and open it when raised completely. If the door is heavy add ¼ turn tension. If the door is too light, in the middle position, remove ¼ turn of tension. If that doesn’t remedy the problem, additional testing may be needed. Lubricate both springs with 3 in 1 oil or a heavier 30 or 40 weight oil. Do not oil the last inch of each spring. This could cause the spring to spin off the cone. Also failure to oil painted springs often causes premature breakage. Re-engage the opener pull the rope toward the garage door, and slide the outer carriage over the inner trolley. Plug in power to the opener, and check the operations of the garage door. I hope it will help you, for more information you may visit Garage Door Experts in Jacksonville fl.
Comments are closed