How to Replace Garage Door Spring
Picture this if you will – it’s early in the AM hours you’re out cold. Suddenly, a loud crash wakes you from your deep sleep. You spring up and out of bed to find the source of the noise? Has the zombie apocalypse begun? After looking through the house with a quick crusted eye once over, you decide to head back to the warm and cozy bed.
It isn’t until you’ve exhausted your snooze button that morning, now in a mad rush to get yourself and your children ready for work and school. Racing against the clock, you manage to get yourself and the rat pack together as you scurry in a frenzy through the garage and into your car. But now your garage door doesn’t open. You feverishly push the remote button with your first reaction being that the batteries must be dead. The noise woke you an online doctor earlier that morning before the nagging electric buzzer on the clock radio. The noise you thought was part of your comatose state was actually a reality when you noticed that the noise you heard was the snapping of your garage door spring.
Your garage door spring breaks and you find yourself and your kids trapped in the garage. Now the panic starts to set in as you wonder how you’ll ever be able to get them to school and yourself to work. Not to mention that this dilemma has pretty much immobilized you, your means of transportation to get ANYWHERE is now trapped. In that instant, you may feel like the world is crashing down on you, and just you alone.
Garage door springs support the entire weight of the door. The springs are wound or stretched under pressure, tightening and loosening as you open and close the door. It’s the door springs and not just the door opener that supports and lifts 300-plus pounds of weight of the door.. Like anything else under pressure, eventually, your springs WILL break.
Here’s my recommended “4- Step Process for Repairing Your Garage Door Springs:
Step 1 – Get Your Car Out of The Garage
You must be saying to yourself, “If I could get my car out of the garage, I wouldn’t have a problem”. If you’re saying this, you’re naturally speaking from frustration. The best way to get through a situation like this is to keep yourself level-headed and look for quick solutions that will allow you to continue your normal way of living without being interrupted by this common event. Just because your garage door springs have busted, doesn’t mean that you don’t have use of the garage door. It is still on track with its rollers and can be manually operated.
Pull the red emergency release cord located above the door to enable you to manually lift the door. Remember that the garage door is a heavy object, and even heavier without the support of the spring which would normally neutralize the weight. If it’s too heavy to lift yourself, have someone else help you. If you accidentally drop the door while you are manually lifting, DO NOT try and stop it with your foot. Dropping a 300-pound door on your foot or any other body part is bound to ruin your day.
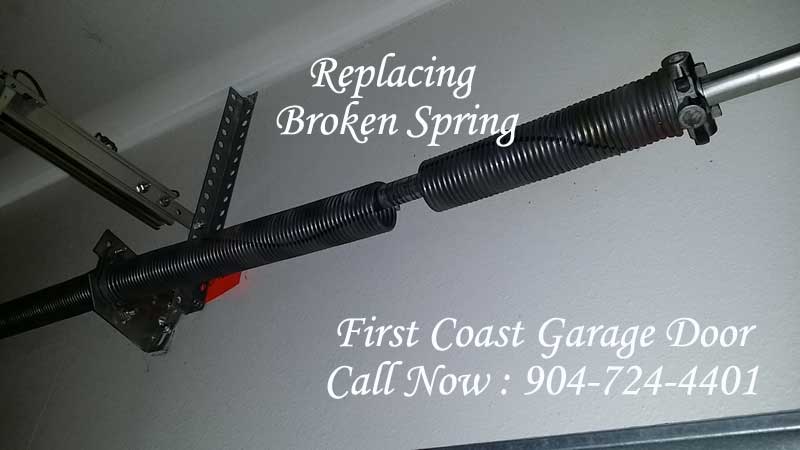
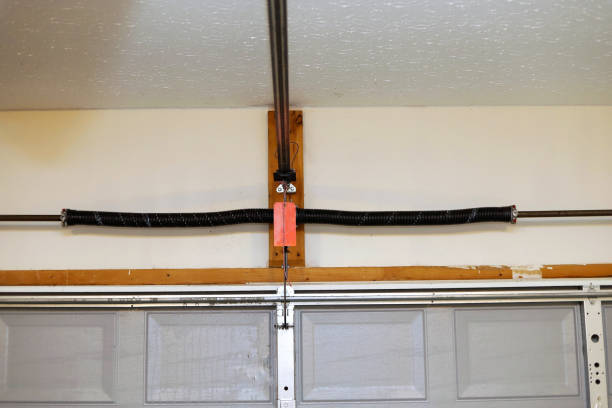
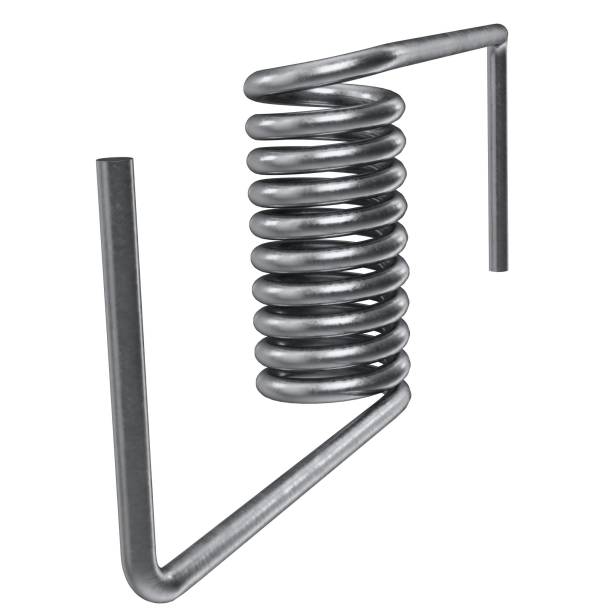
Step 2 – Identify Your Spring
Identify which type of spring you have: Extension or Torsion. Torsion and Extension springs exert a force equal to the weight of your garage door. This counterbalances the 200 to 300-pound door, rendering it weight neutral so it can easily be opened.
A Torsion spring runs across a bar at the top of the inside of the door. The spring is wound and under immense tension. It’s the tension of the torsion spring that lifts the weight of the garage door.
Extension springs are found on either side of the door. These springs act like big steel rubber bands, stretching as the door is lowered.
Step 3 – Buy New Springs
Now that you know what type of spring you have, you need to purchase new ones. You’ll want to replace all of your garage door springs at the same time. Having undergone similar aging and weathering, one broken garage door spring is a sign that the second one is about to break soon. There’s no logical reason to fix one spring at a time and just wait for the other one to break, unless you enjoy the headaches and hassles.
Also, having one old spring and one new spring will throw off the balance of your garage door. You ‘ll also burn out the motor on your garage door opener and have even more problems. You can find and purchase new garage door springs at your local hardware store, such as Home Depot or Lowes. Prices will vary depending on the type of spring size, quality, coating, and cycles.
Size – You’ll need to measure your existing spring to know exactly what size replacement you’ll need. There are 4 accurate measures you’re going to need: (1) Wind Direction (2)Wire Size (3) Diameter – Torsion springs measure inside diameter and extension springs measure outside diameter (4) The Overall Length of the Spring.
Coating – Is it galvanized, powder coated, or oil tempered? Which is going to resist rust the longest?
Step 4 – Installation
Installing your new garage door springs is not only a lengthy and complicated process but potentially dangerous. You have got to remember that the garage door springs are wound up with more tension than Steve Carell as the 40-year-old Virgin. The slightest mistake or mis-calibration could be a deadly one.
9 times out of 10, homeowners will find the task of repairing or replacing garage door springs too complicated, if not too dangerous.
Hopefully, this information will help you and your family if not don’t hesitate to give us a call at (904) 724-4401 and we will be at your door without wasting any time.
Comments are closed